Neovim Overview
Goal Of This Article
This article is an overview of how Neovim works, its visual components, startup sequence, and how
to use the nvim command in terminal
How Neovim Works
Neovim is a terminal text editor program that displays a textural user interface (TUI) in the terminal. By interacting with Neovim, the user can open, edit, and save files to the computer.
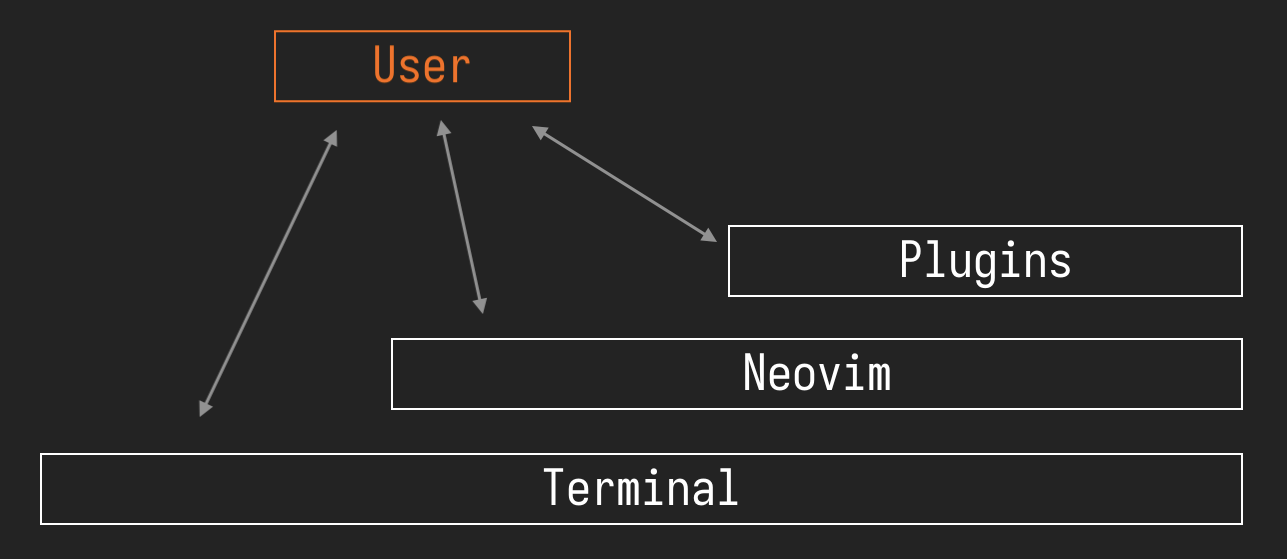
Similar to how Neovim runs in a terminal window, Neovim plugins must run in a Neovim instance. All user interactions will either be with the terminal, Neovim, or a Neovim plugin. This relationship is illustrated in the diagram below.
While there are graphical ports of Neovim (ones that runs separately from a terminal, such as the Neovim-QT), they are less versatile and offer much of the same functionality as the terminal counterpart. For this series, we'll focus on the Neovim terminal executable.
Visual Components
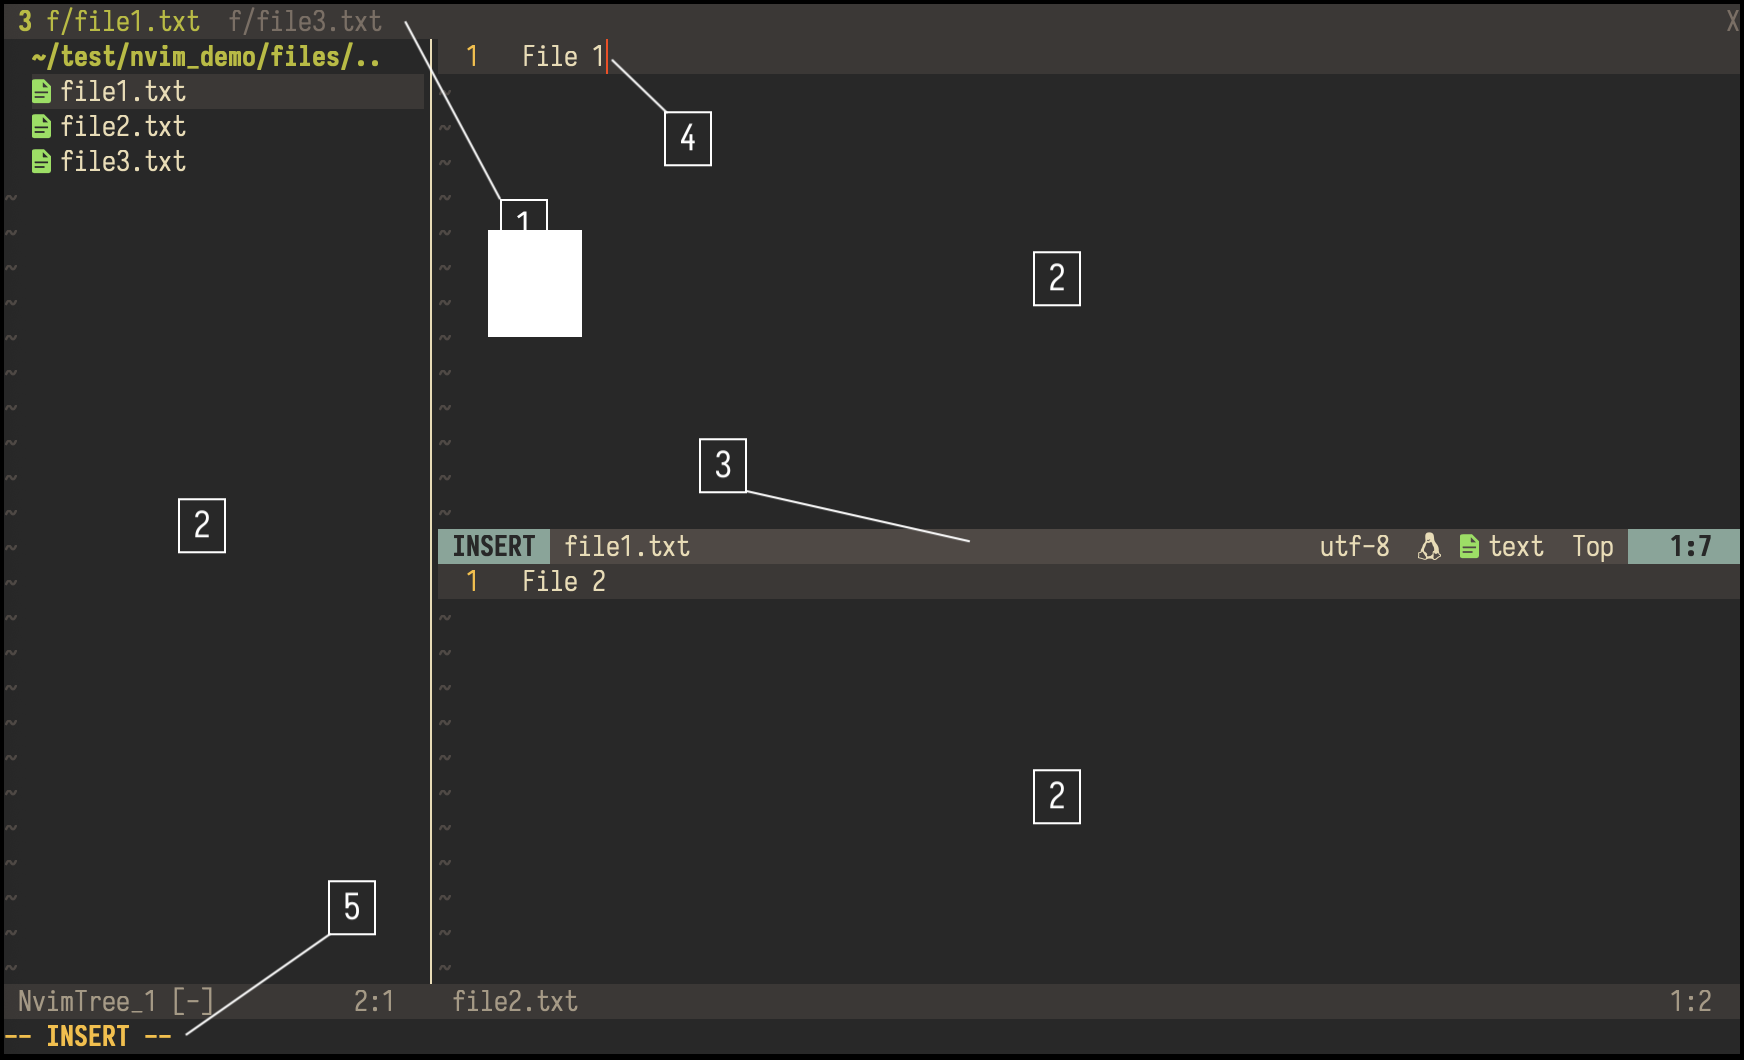
Above is a screenshot of a well configured Neovim editor to illustrate the different on-screen components. Correspond each number with the item below
Tabline can be thought of browser tabs, except instead of webpages, it displays a series of panes displaying buffers.
Pane/buffer
Panes are the components responsible for displaying a buffer, whereas a buffer is the actual contents (i.e., the text) stored in the computer's memory.
Texts in buffers generally come from a file, but could originate from Neovim itself, commonly a plugin. In the latter case, the texts generally act as a display of information, such as the file structure in a directory.
There are three panes in the above sample. The leftmost pane displays a file explorer with text in that buffer generated by a file explorer plugin. The user can interact with it in specific ways to add, delete, and perform other operations with the file system.
Statusline refers to bar that at the lower part of each pane, displaying useful information of the pane.
The default, unconfigured statusline doesn't do much
However, in the above image, the statusline has been configured to display the
- mode (
insert), - file name (
file1.txt), - file encoding (
utf-8), - line ending style (UNIX, indicated by the penguin),
- file type (
text), and, - cursor location (
Top 1:7)
in that order.
The cursor location comprises of two parts:
- a percentage indication (or
Top/Botfor first/last line), and - "line number":"column number"
For instance, in the above image, the cursor is on the seventh character on the first line (
1:7), at the top of the file (Top).Cursor can be understood to be the cursor in a word processing program. It is the location where text will be inputted.
In Neovim, typing text might not always translate to text being inputted. Generally, the location of the cursor indicates which pane/buffer you're commands will affect.
- Command line is where the user typed commands will appear. Currently, since the editor is in
insertmode, it is unused so Neovim displays the mode instead.
Command Line Usage of nvim
If you've successfully installed Neovim (see Prerequisites if not already), you should be
able to open terminal and type nvim, followed by the enter key.
This will open the Neovim editor on an empty, unnamed file with some messages in the center of the screen starting with the version followed by some command suggestions. Something like the following
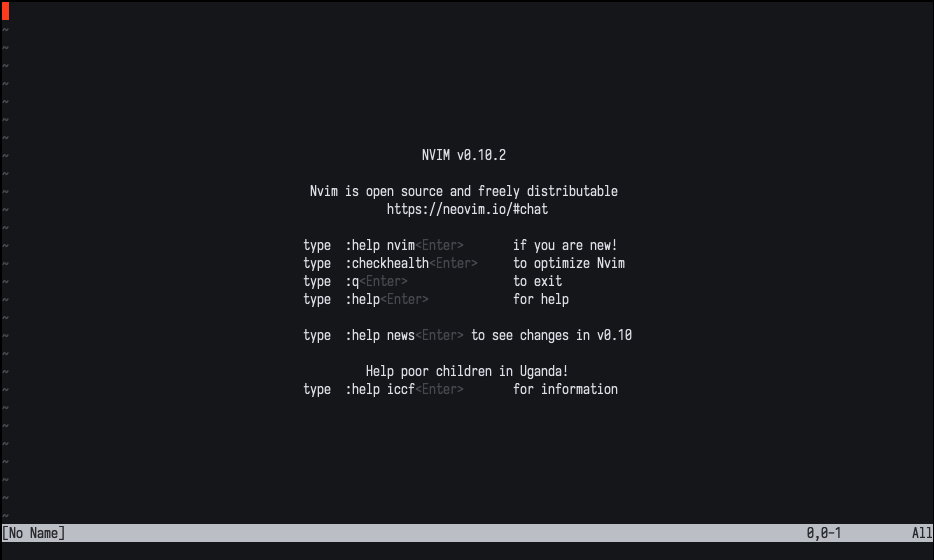
To quit the editor, type :q, then press enter.
Though cool, this isn't useful. We usually open an editor to edit files. To open a file, navigate to
the directory where the file is located in your terminal, then type nvim <file name>, followed by
the enter key. You should see the file contents being displayed.
Similarly, to quit the editor, type :q, then press enter; if you're met with an error, try :q!,
followed by the enter key. Specifics of the :q command will be explained in the commands section
in the next article of this series. For now, know that it is the way to quit from the editor back
to your terminal.
You may chain specify multiple files to open, such as nvim file1.txt file2.txt file3.txt.
Without additional flags introduced below, you'll find only the first file is displayed while the
others are opened as buffers hidden away.
Aside from file name, you may also open files with certain options flags, a few key ones are listed below
-R: read only mode. You may still edit the file, but may not save it.--clean: loads Neovim ignoring any configuration files. This may be useful in later sections of this series.-o[N]: opens the list of specified files in separate panes stacked horizontally, with at mostNpanes-O[N]: opens the list of specified files in separate panes stacked vertically, with at mostNpanes-p[N]: opens the list of specified files in tab pages, with at mostNtabs--: indicates the end of options, notifying Neovim that all text that follow are file names. This is only useful if your file names look like option flags.
For instance, the command
nvim -R --clean -o2 file1.txt file2.txt file3.txt
will open three files: file1.txt, file2.txt, and file3.txt in read only mode, ignoring any
plugins, in two horizontal panes.
If you want to read more about starting arguments, see the Neovim official documentation.
Startup Sequence
When you type a nvim command and press enter, Neovim will perform a series of tasks, such as
understanding the flags and reading the files the user specified to open (if any). While most
details of the start up process is unnecessary to understand as a user, we should understand one of
the important steps that occurs: reading the user configuration of the editor.
User configuration of Neovim need to be placed at a fixed location to be read and applied by the
editor on startup. For UNIX systems, this file location is ~/.config/nvim/init.vim or
~/.config/nvim/init.lua. For Windows, this file location is ~/AppData/Local/nvim/init.vim or
~/AppData/Local/nvim/init.vim.
We'll get to writing configurations in later articles. For now, know that they're files that specify how the editor should look, behave, and what plugins to include. Also note it is read again every time the editor starts from a terminal command.
As a side note, Neovim startups are generally extremely fast. Neovim on my personal configuration (~2000 lines) starts consistently in less than 200 ms.
Next, we'll learn about navigating the editor with Vim keybindings.